Wall-Mounting a Dust Collector in a Small Workshop (Beginner Guide Part 2)
Setting up dust collection in a small workshop sounds simple… until you actually try to do it.
What started as a straightforward idea quickly turned into a multi-day puzzle involving awkward corners, custom adapters, and even a few broken 3D prints.
In this post, I want to walk through the practical decisions and lessons from this build so you can plan your own dust collection system more easily.
We’ll cover:
Choosing the best location for a dust collector
Why I mounted the cyclone directly to the motor
How airflow resistance affects performance
Why flex hose should be used carefully
A clever removable bin solution using magnets and 3D printing
Previous Blog Series Part: Building a Workshop Dust Collection System (Beginner Guide Part 1)
If you want to follow along with the series, you can join me on YouTube, where I share not only the information shared here, but also the raw, real experience of me setting up my own dust collection system. Watch this episode here or start from episode 1.
Planning the Location of a Dust Collector
Before mounting anything, the biggest challenge was simply deciding where the system should go.
In a perfect world, the dust collector would sit close to all the machines that produce the most dust.
A good general rule is:
Keep your dust-producing tools as close to the dust collector as possible.
Shorter duct runs mean:
Less airflow resistance
Better suction
Higher CFM performance
Unfortunately, real shops rarely make things that easy.
In my case, every corner of the shop had a problem:
One corner had the electrical panel
Another had a gas heater (not ideal for dust collection nearby)
One was far away from the tools
The last corner was near the entrance and had obstacles
Ultimately, I chose the entrance wall and reorganized part of the shop to make it work.
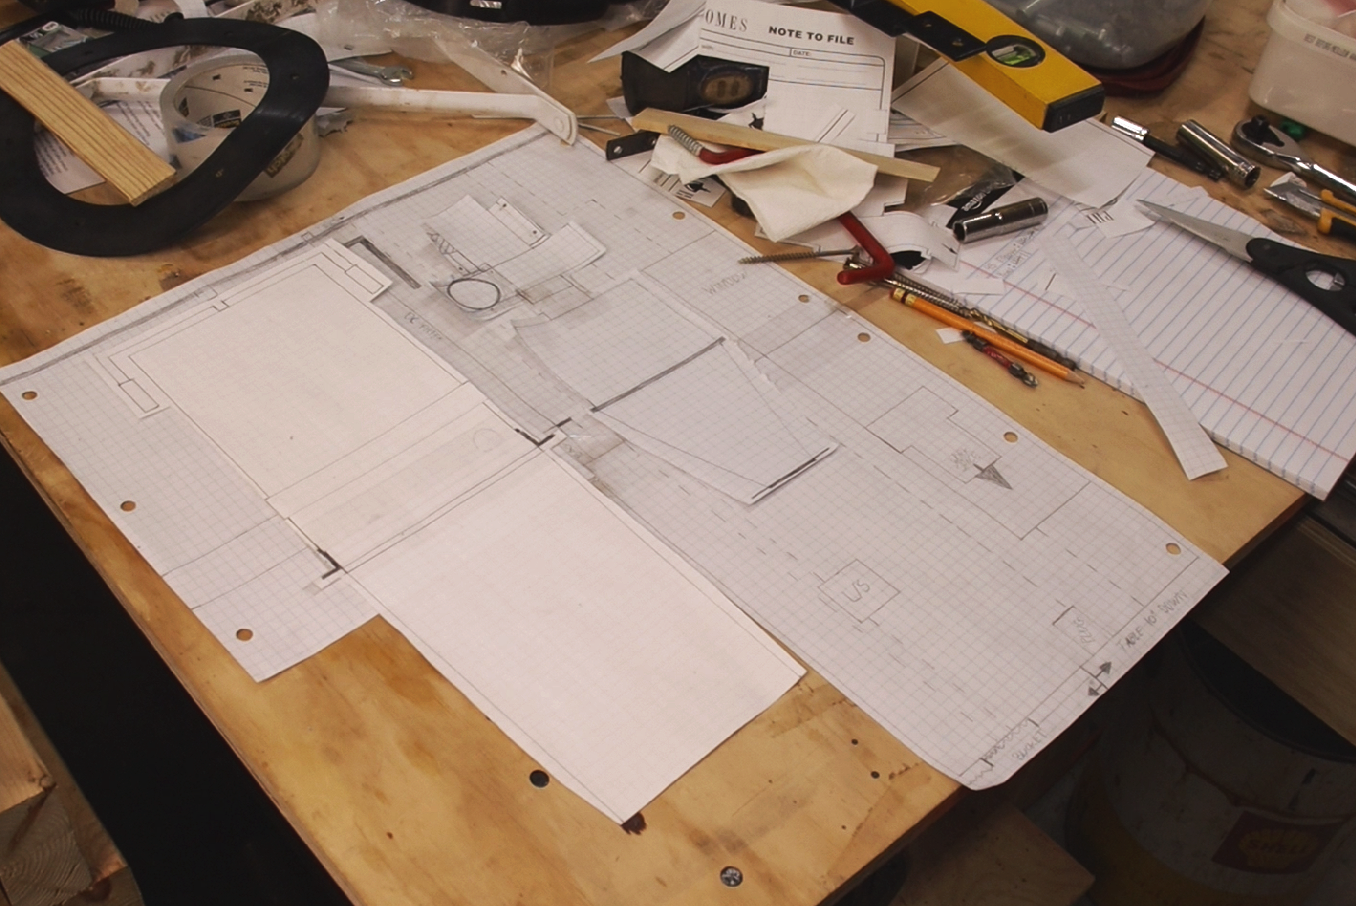
Tip: Sketch Your Layout First
One of the best things I did was create a scaled sketch of the wall layout.
Each square represented one inch, allowing me to move components around virtually, check clearances, and avoid mounting heavy equipment twice
Wall Mounting the Dust Collector Motor
Once the location was finalized, the next step was mounting the blower motor.
The motor was supported using:
Lag bolts into wall studs
Heavy L-brackets
Reinforcement through plywood mounted to studs
Dust collector motors are heavy and vibrate during operation, so it’s important that the mount is secure and rigid.
If the mount flexes or shifts, it can cause excess vibration, noise, and long-term structural stress.
Why the Cyclone Should Sit Close to the Motor
One key design decision was mounting the cyclone separator directly under the motor.
This is similar to how many two-stage dust collectors are designed.
The reason is simple:
Cyclones already add airflow resistance.
Adding additional ducting between the motor and the cyclone increases static pressure and reduces airflow. Keeping them connected with a short piece of duct helps minimize these losses. This setup required carefully aligning the two inlets so they connected properly with a short duct section.
Extending the Drop Zone to the Floor
The collection drum normally sits directly under the cyclone.
But in my setup, the cyclone ended up mounted about 6 feet off the ground, which would make emptying the bin extremely difficult.
To solve this, the drop zone needed to be extended downward to floor level. The complication was that the cyclone outlet didn't align with the barrel location. To fix this, I designed custom 3D-printed adapters that changed the pipe angle, reduced the outlet size slightly, and offset the pipe away from the wall. I know, sounds a bit wacky…
This allowed the dust to drop cleanly into the barrel while keeping everything aligned.
Why I Avoided Using Flex Hose
Flex hose is incredibly convenient in dust collection systems, but it comes with a major downside. Because of the ridges inside the hose, it can increase friction loss dramatically.
Depending on the installation, a flex hose can add anywhere from 50% to 400% more airflow resistance than a smooth duct. That doesn't mean flex hose should never be used — it’s great for short tool connections — but long runs should be avoided whenever possible.
For this build, I chose rigid pipe to maintain better airflow.
Reducing Airflow Resistance with Proper Duct Connections
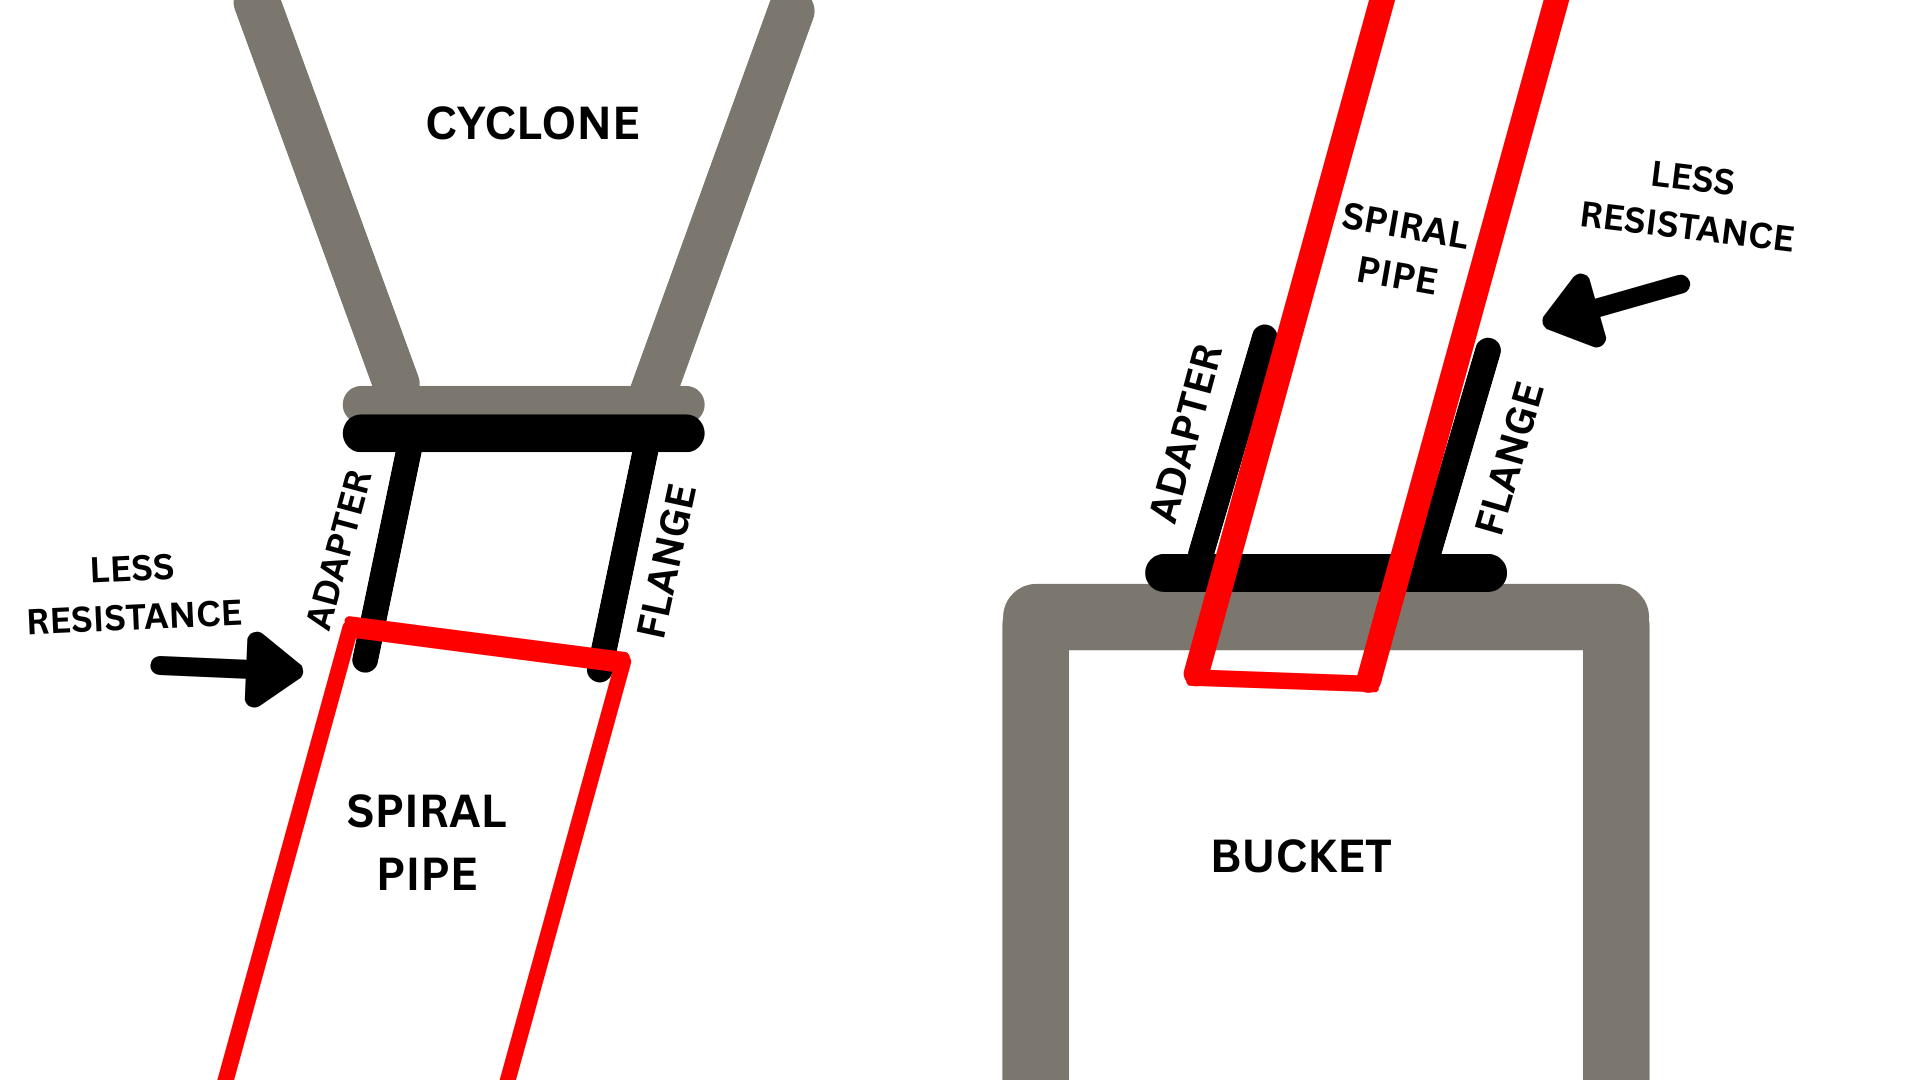
Another small but important detail was avoiding internal ledges inside the ducting.
When a pipe slides inside another fitting incorrectly, it can create a lip where dust collects. That lip increases friction and can cause debris buildup.
To prevent this, I designed the adapters so that:
One side allows the pipe to slide over the adapter (LEFT)
The other allows the pipe to slide into the adapter (RIGHT)
This keeps the airflow path so that the dust is going to flow smoother and reduces resistance.
Making the Dust Bin Easy to Remove
Dust collection systems only work well if they’re easy to maintain.
If emptying the bin becomes a hassle, it’s tempting to put it off… to solve this, I designed a removable magnetic connection between the pipe and the collection bin.
The system uses 3D printed adapters, embedded magnets, and a short flex hose section. The magnets hold the connection securely during operation but allow the bin to detach easily for emptying, making maintenance quick and simple.
If you don’t own a 3D printer, I’ve seen some woodworking supply stores sell a similar solution.
Understanding Negative Pressure in the Collection Drum
Dust collection systems operate under negative pressure.
The drop zone (the collection drum) needs to maintain slightly lower pressure than the surrounding air so dust falls downward instead of traveling toward the blower.
However, too much negative pressure can cause problems. Potential issues include:
1. Collapsing collection bins
Thin metal or plastic barrels can collapse under strong suction.
2. Reverse vacuum in dust bags
If you use a bag inside the bin, suction can pull the bag upward toward the cyclone.
Some systems include a small hose that balances pressure to prevent this.
In my setup, that hose wasn’t practical due to space constraints, so the ports were sealed.
A Small Touch of Walnut
Finally, I added a walnut platform to support the cyclone.
This wasn’t strictly necessary, but it added a bit of character to the build. Sometimes it's nice to mix a little craftsmanship into even the most functional parts of the workshop.

What’s Next in the Dust Collection Series
This article is part of a series documenting the real process of building a dust collection system in a small workshop.
Upcoming topics include:
How to choose a dust collector
Understanding CFM and airflow
Static pressure explained
Designing efficient ductwork
Testing and optimizing dust collection systems
& More!
If you’re interested in following along as I continue sharing more information and sharing the real, raw experience of me setting up my own dust collection system, you can watch the full series here: DUST COLLECTION PLAYLIST
Frequently Asked Questions
Should a cyclone be mounted close to the dust collector motor?
Yes. Cyclones add airflow resistance, so keeping them close to the motor minimizes additional static pressure and improves airflow efficiency.
Is flex hose bad for dust collection systems?
Flex hose is useful for short tool connections, but long runs significantly increase friction loss and reduce airflow. Smooth ducting is generally preferred.
Why do dust collection bins operate under negative pressure?
Negative pressure pulls dust downward into the collection drum instead of allowing it to travel toward the blower motor.
Can a dust collection drum collapse?
Yes. Thin plastic or metal drums can collapse if the vacuum pressure becomes too strong.
Why avoid internal ledges in duct connections?
Internal ledges increase airflow resistance and can trap dust, leading to clogs or reduced performance.